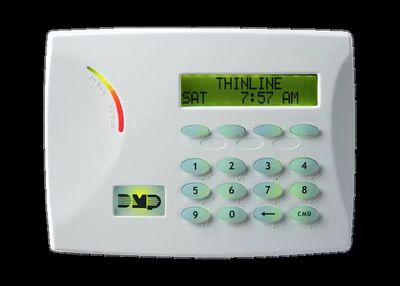
DMP 7070 Style Alpha Keypad

HOW TO ARM DIFFERENT AREAS
Checking Zone status before ARMING
If one or more zones are not in a normal condition, the keypad displays SYSTEM NOT READY. Pressing any Select Key during this display shows the zone names that are NOT READY.
ARM System
1. Enter your user code. The keypad displays ALL PERIM or HOME SLEEP AWAY
2. Select HOME or PERIM to arm the Perimeter only
3. Select SLEEP to arm the Perimeter and Interior (except bedroom areas).
4. Select ALL or AWAY to arm the Perimeter, Interior, and Bedroom.
5. If a problem exists on any zones, the zone name and problem display followed by: OKAY BYPASS STOP.
a. Select OKAY to force arm the zone(s) before arming.
b. Select BYPASS to bypass the zone(s) before arming.
c. Select STOP to stop the system from arming. Correct and return to step 1.
6. The keypad next displays EXIT: ## INSTNT and begins to count down the number of seconds remaining for you to exit.
7. You can select INSTNT while EXIT: ## INSTNT displays to immediately arm all zones and remove entry/exit delay.
DISARM All Areas
Enter your user code to disarm the system.
DISARM All Areas (while in alarm)
1. Enter your user code
2. Keypad displays CANCEL VERIFY
3. If alarm is false, press Select key under CANCEL to cancel alarm.
4. If the alarm is valid or you are unsure of the cause of alarm, press the Select key under VERIFY to alert the Monitoring Center that you verify the alarm they just received.
Quick Arm HOME or PERIM
Press Key 3 for 2 seconds to arm the perimeter.
Quick Arm AWAY or ALL
Press Key 3 for 2 seconds to arm the perimeter.
Quick Arm SLEEP
Press Key 7 for 2 seconds to arm the perimeter and interior areas and leave the bedroom area off.
Turn Chime (Monitor) on/of
Press Key 5 Chime (Monitor)
Sensor Reset
Press Key 2 for 2 seconds, then enter your user code if required to reset the system.
Download User Guide
Cookie Policy
This website uses cookies. By continuing to use this site, you accept our use of cookies.